20 November 2011

An Explanation of What All This is About

What are we building?

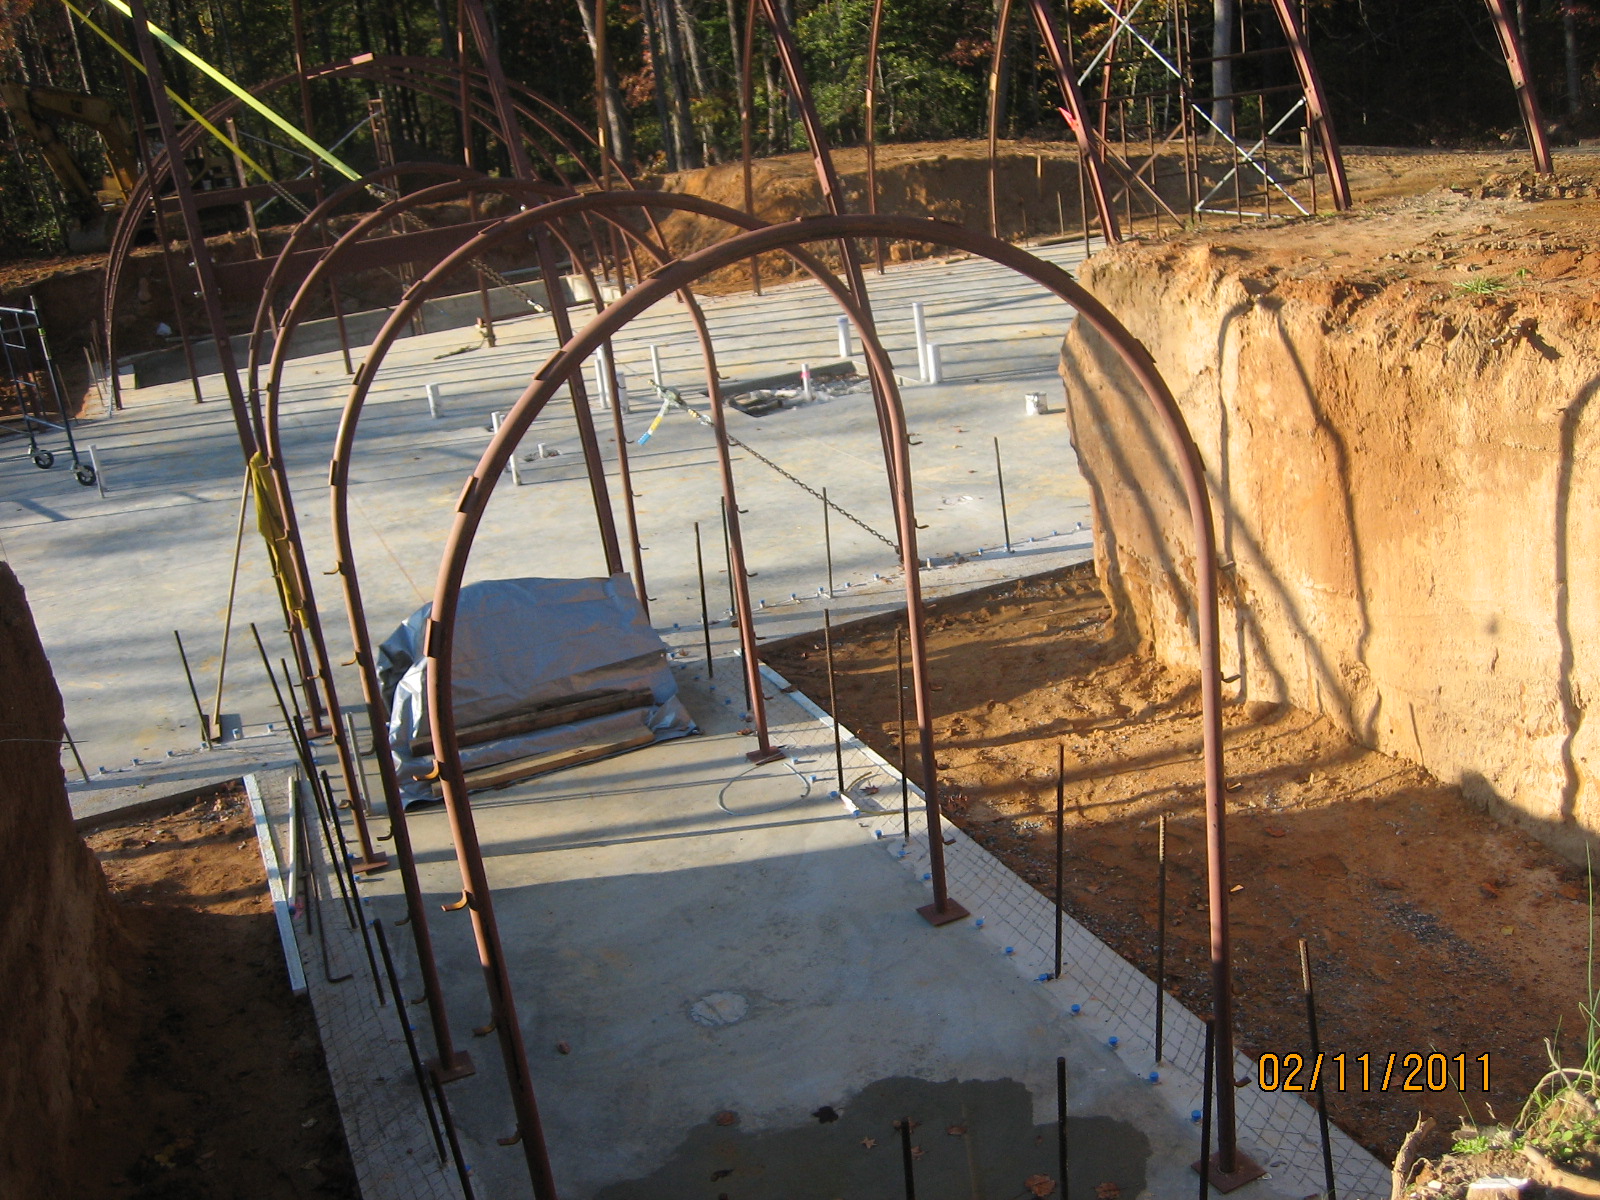
This is not the run-of-the-mill conventional house.  It is an underground shelter which has windows and doors on 3 sides.  All those windows  on the end walls should let in the daylight.  We wanted a curved roof as that has more strength to hold up the earth.  The main structure is a 40 x 66 quonset hut with a 24 x 18 quonset hut forming a T to the West.  We have a smaller T to the East which is 6 x 18.  And there is a second structure which is a 24 x 24 quonset hut with an half dome attached to one end. So it's total length is 36.  It is open at one end and faces South. It is a garage/workshop.


We are incorporating the Passive Annual Heat Storage (PAHS) concept with both structures.  This involves earth tubes and an umbrella. Earth tubes are sets of pipes which run thru the earth, opening at the floor and ceiling creating a thermal syphon.  The warm air in the building rises and goes thru the ceiling pipes, and the air in the building is replenished by the cooler air coming in thru the floor pipes. The lower tubes run under the building, the upper tubes run on the outside of the building under the 'umbrella' and eventually, all the tubes run alongside each other, exchanging their heat.  All earth tubes after running thru the earth, open to the air beyond the umbrella.  The umbrella is  a layering of plastic and insulation that is laid like shingles over the dirt over the house, and including 20 feet around the house.  It is used to insulate the earth above, around, and below the house.  Above the umbrella is about a foot of topsoil.  The plastic keeps out the rain; the insulation keeps out the temperature changes.  During the summer, the sun heats up the house by shining thru the windows.  The heat is conducted thru the walls and floors and excess heat  goes thru the upper earth tubes and the lower earth tubes bring in cool air.  The earth tubes in this way heat up the soil under the umbrella.  During the winter, the colder air descends the lower earth tubes; warmer air comes into the house thru the upper earth tubes from the warmed earth.  We had to compromise.  We agreed with the company making our 'kit' that the upper earth tubes running on the outside of the house (in the dirt) are subject to shear due to the earth settling, no matter how much compacting we did.  So we are having the upper earth tubes be at ceiling level, and come down within the house and go under the slab and out, just like the lower earth tubes.  This necessitates  a fan for each of the upper earth tubes, to make the air flow as it won't flow on its own as it would in a thermal syphon system.

Why are we building what we are building? 


We want to be as energy conscious as we can. Hence, the PAHS mentioned above.  We have a handicapped child, and are thinking of our possible incapacities in the future, so the floor plan is very open and the first floor has everything we need.  

The pool area is sunken so that one can sit on the side of the pool and swing one's legs over into the water.  We are planning an Endless Pool which has a return-flow system which will act like a ledge within the pool.  The pool will provide much needed aquatic therapy.

We wanted a smaller house.  However, to get two bedrooms on the first floor, next to each other, it was necessary to go with the larger quonset hut.  And the second floor capability came with the larger quonset hut.  

The 6 x 18 quonset hut was actually a tunnel in the first renditions of the house as we wanted to connect the garage and house and have a way of getting the wheelchair into the vehicle while under cover.  But the cost of the tunnel outweighed our desires, and the tunnel became a pantry/wine cellar.  It is partially insulated to keep the warmth of the PAHS and house from getting it too warm.  And the umbrella will end very near the end of the pantry such that the far end should be cooler than what is closer to the main living area.

We are still thinking of future possibilities: of incorporating some wind turbines and/or solar technology. The hill that we have dug into seems to almost always have a breeze.

How are we building this project?


That is what this blog is all about.  Not knowing much about building with concrete, we are the general contractor/owner and have obtained the services of local companies to help us in this endeavor.


19 November 2011

Delays Due to Technical Difficulties

We have been having some great weather, along with some rainy days.  We took this time to dig some ditches and bury some pipe. We have engineers working on two fronts currently.   One need addressed the framing plans for the 4 exterior walls that will be exposed to the elements, whereas the rest of the house will be 'underdirt'. And along with that, they are looking at wind load - making sure the wall will withstand the wind force that will be applied to it especially in a storm.  The framing plans are done at this point, but the wind load has still to be factored in. We want a seamless appearance for the retaining wall and the framed wall, so we had thought stucco.  With the wind load, and the possibility of the framed wall moving and cracking the stucco, we are looking at other alternatives.

And the other engineering problem has to do with the second floor and the structural integrity thereof.  See photo.  There is very little for the 39 ft I-joists to sit on and they need to be 'trimmed' beyond what the manufacturer recommends. The tape measure shows the 11 7/8" height of an I-joist and where it would be cut (5 inches would be cut off where the I-joist is supported by the side steel beam).  The engineer  that engineered the structural drawings said, "I am aware that the joists are trimmed back over the steel beam supports. This is a tried and proven method that has worked well for many years.  It is not conventional, but neither is the structure in which it is used."   Other engineers and building experts are not so glib.


The other problem we are addressing has to do with that ridge beam we had problems with before.  It is still too short, but this time on the other end.  We will be looking into getting a local welder to see how he can fix it rather than contacting the company that supplied the kit. This picture shows the end of the ridge beam of our 24 ft west annex where it should attach to our 40 ft main structure.  We still have to get the annex precisely plumb and measure  how much off it is, but it appears to be about 7 inches. 


 We have also ordered additional materials we will need - 6" PVC Schedule 40 pipe and fittings and insulation for our earth tubes, and a culvert pipe.  The culvert pipe serves two purposes, it protects the earth tubes from road traffic, and serves as a heat exchanger.  Our windows are ready to be delivered!  So we need to clear out an outbuilding to store them until WE are ready to install them - after the shotcrete process. 

There is plenty to do to keep the site from eroding while we work through our current issues. We have been putting some rebar on the garage, and we will continue to do that until we can get more help with it. Bill has kept busy doing work on the house project and keeping up with work around the farm that needed to be done.

04 November 2011

Pictures of the House of Steel

 A request came to see more pictures of the steel.  The second floor supports are still missing - two are in place.  And the 24 x 18 west annex is not attached to the 40 x 66 as yet.  Otherwise, all of the big steel pieces are in place.
A view from the East

The pantry/wine cellar that was first thought of as a tunnel to the garage

A look North down the East wall

One of the second floor supports is in place at the pantry entrance


You can see another second floor support at the West Annex entrance.  Also visible are the tabs along the outside of the arches.  The panels and a set of rebar are attached to them.  Very sharp - watch out! All of the arches will have them bent up and ready for panels.


A view down the West wall of the main structure looking North.  Notice the first 6 feet is dirt between the two arches.  That allows an overhang for our southern exposure. And between the arches along the side of the structure, there are lots of one inch PVC pipe mostly buried in the concrete slab.  They will hold vertical rebar.  The yellow straps are binders used to help keep the structure stable while erecting it.


Looking East from the West side of the structure thru the West Annex to the East pantry

From the NorthWest side looking SouthEast

View from the Northwest corner to the Southeast

01 November 2011

A Reason to Celebrate

All of the parts - steel beam extension and bolts to tie it in, and the tap-tights to fasten the two 33 ft beams together to make a 66 ft beam - arrived last Thursday with no further instructions on how it was to go together.  And as of today (it's Tuesday), ALL OF THE STEEL ARCHES AND BEAMS ARE ASSEMBLED! 

The attaching of the extension to the beam was probably the trickiest part.  Bill took that on.  He was up on scaffolding, with the beam and arches that were already assembled.  The beam being a box beam and each arch being a piece of metal to attach to the box.  So ordinarily, the 2 bolts need to go thru 4 pieces of metal, holding both arches together with the box beam in the middle.  With the extension, he had to unbolt the bolts and add two pieces of metal that were welded on the outside of the beam extension, inserting them between the box beam and each arch.  Six pieces of metal with each set of two bolt holes had to be aligned. He got the first bolt in which took some doing.  Then the second bolt needed a different tack. One of the tools he used was a big pipe wrench and he ground one of the bolts so that it was slightly pointed (bevelled the end of one of the bolts so that it would slip through the slightly misaligned metal).  He applied the 36" pipe wrench to move the arch where it needed to be and tapped the bolt with the bevelled end while holding everything in place, and it went in!

There are steel 2nd floor supports that still have to be added to the structure. 

We have had some more rain, and needed to re-compact the soil around the slab of the house.  

The erection of the steel was done by hand except for the 40 x 66 part of the house.  Here are some videos that show the process of attaching each arch to the main beam.   The team got it down to about 15 minutes per arch.


T