12 September 2013

We're Almost There (House Covered)

The house is just a white seam down the middle of the hill of dirt. 
Perhaps TOMORROW will be a day of celebration!

31 August 2013

The Field IS a Field Again


Danny has moved all of the dirt out of the field.  These pictures show his last load. It still needs to be placed on the house...


Bill is, I believe, cultivating or otherwise tilling the soil, and broadcasting seed to get groundcover to grow as we expect some rain in the very near future.

29 August 2013

Retaining Wall at Garage Earth Tubes Completed, Earth Moving Continues

Bill and Damien completed the retaining wall Tuesday the 13th.


 Danny worked well with good weather for a week at putting dirt on the house. 
 See Danny on the West Annex (tried for a long time to get this video uploaded....resorted to a link)

The telephone contractors came and 'sawed' a trench for the underground cable, laid the cable, and let us fill in afterward, which Bill did.


09 August 2013

Covering The House and Earth Tube Retaining Wall

Excavation continues.  Danny took a couple of weeks off and is now covering the house with dirt.  At this point, the tunnel is covered; and dirt is about 3 feet higher than the second floor.  Bill can easily walk across the West Annex.
Northwest backfilling area

Southwest backfilling

East side

East side with tunnel marked

East side looking South

Tunnel area
 The retaining wall at the garage earth tubes is progressing.
Notice the red dashed line.  Miss Utility marked where the underground power line is.  The phone company representative and the contractors have been here to scope the work,  but were not prepared to dig as deep as we require.  They will be back next week to dig the trench and we will backfill and THAT will be DONE!

14 July 2013

Insulation Driven by Appearance of Excavator Danny

Danny started moving some of the dirt 'on top of' the house.  Actually, it will take a lot of time and work before he gets to the 'top'.  But he has started to move dirt up the West side and East side of the house.  So, we needed to place the insulation on the retaining walls so the dirt under the umbrella will be insulated from any heat gain/loss thru the walls.  We still need to insulate part of the tunnel on the East side. 
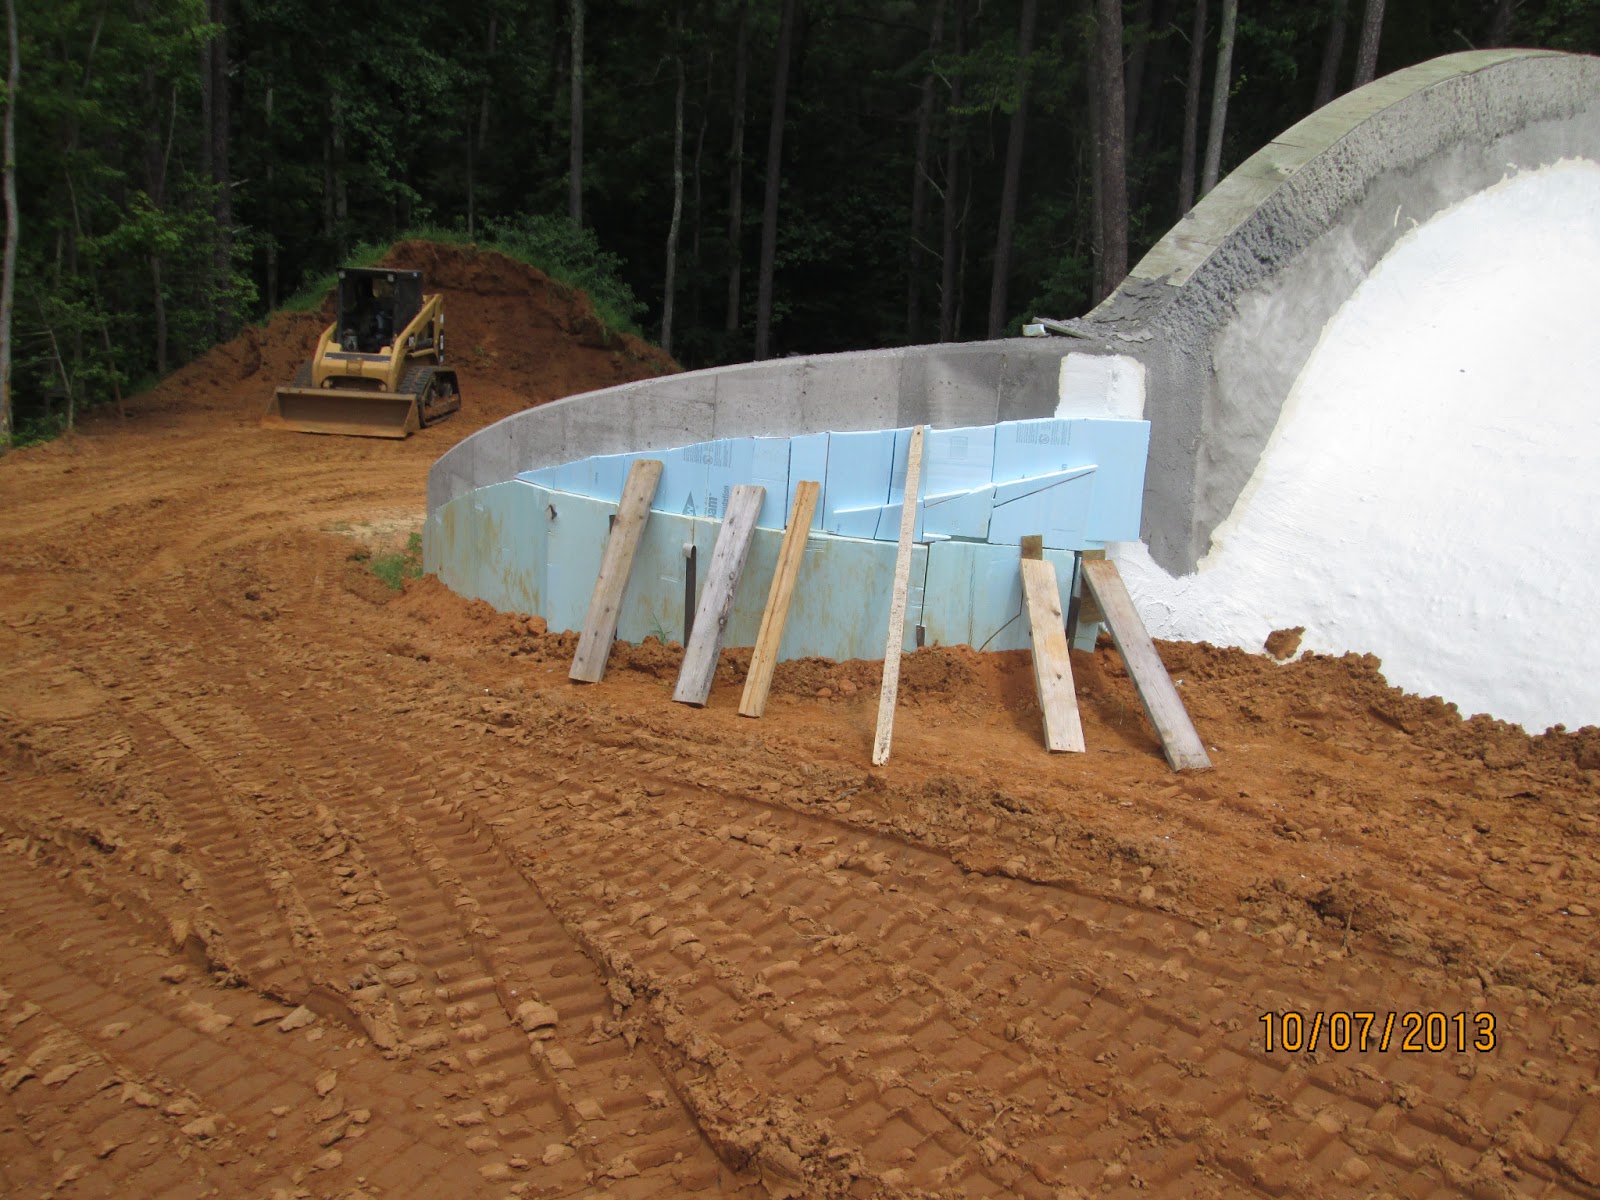


 We used an adhesive to have the blueboard adhere to the concrete, and propped them up in the meantime.  This way we don't need to be in Danny's way to hold the insulation in place and possibly get buried alive.


24 June 2013

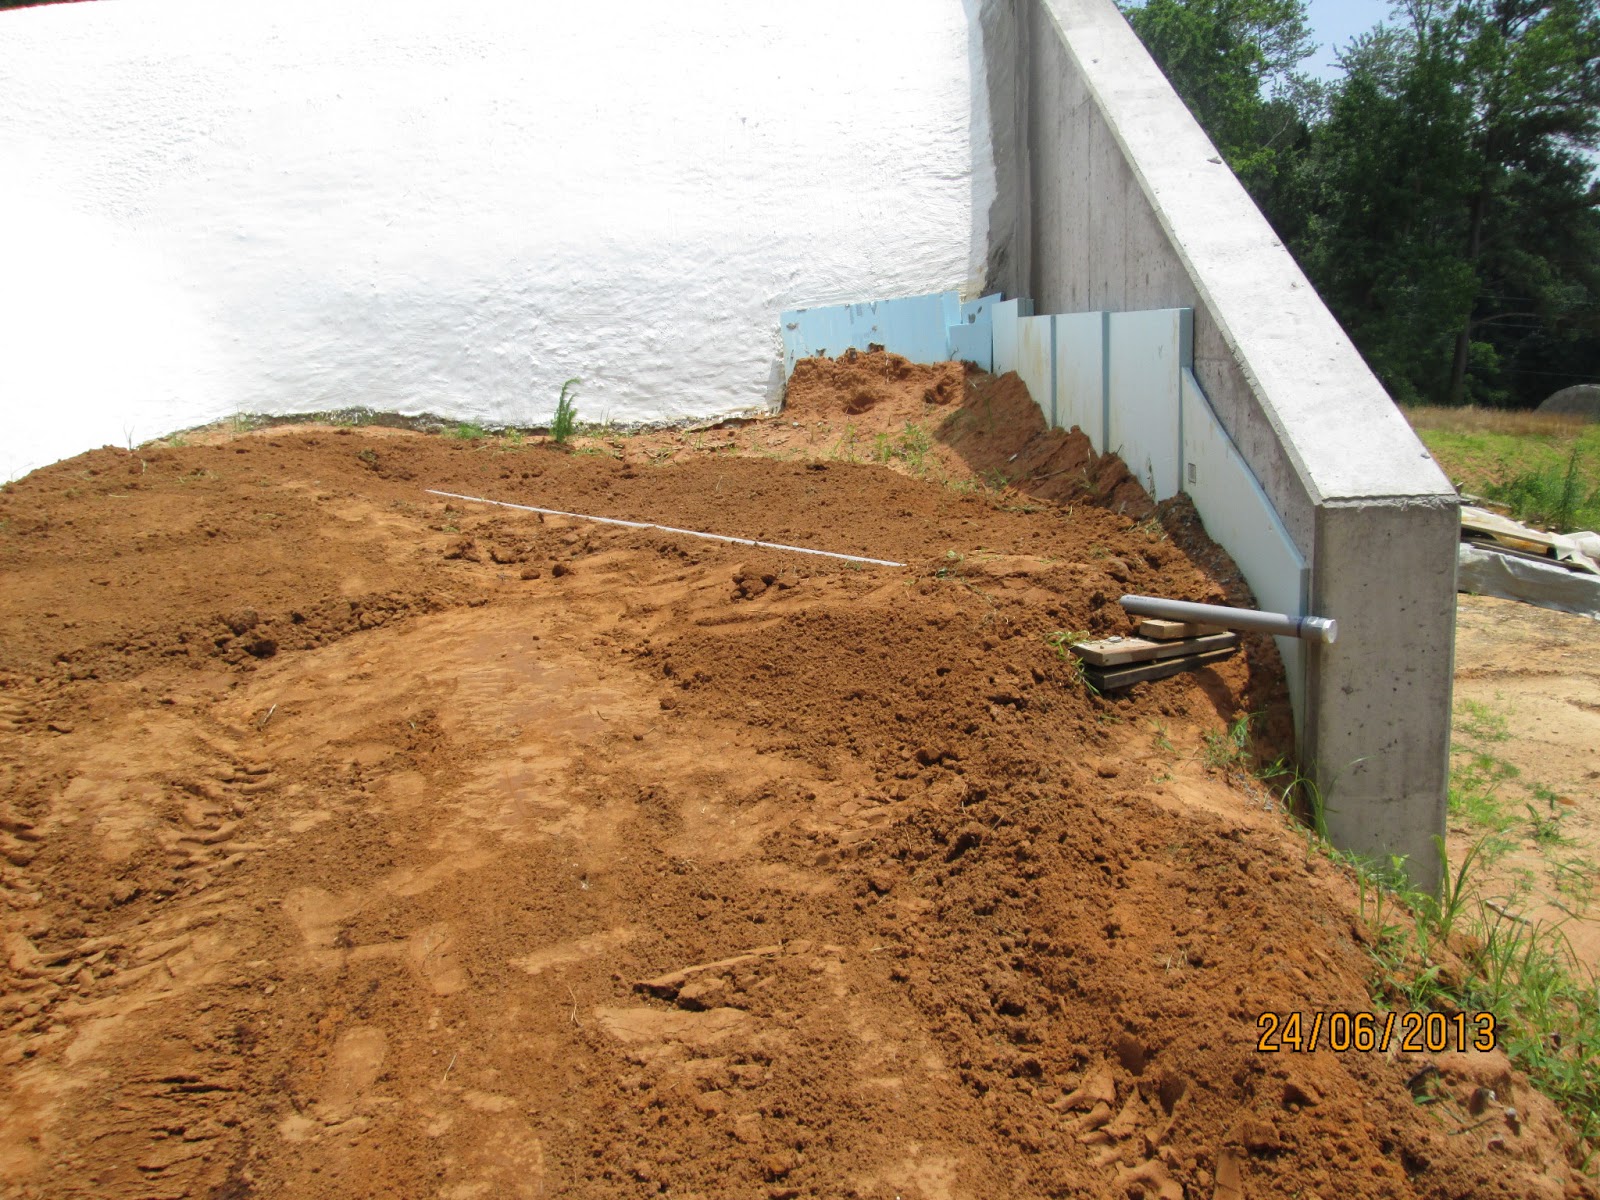
The Waterproofing is now pronounced FINISHED; Interior Plastering; Temperature Probe Conduits

Liquid EPDM does work.  It now covers our house and makes it look similar to an igloo - very bright white in the sun.
These pictures are of the primer applied to the 'tunnel' and West Annex, and the butyl tape inplace on the retaining wall connection to the parapet (only one picture, four actual retaining wall/parapet connections).


There are no leaks....except....at the parapet which needs to be addressed after backfilling.
On the interior, the tunnel has the base coat of concrete plastering, and work continues on the East interior wall.  During one rainstorm where we measured 5 inches fell, we had rain coming in a conduit where the water pipe will eventually enter.  We capped that pipe to help keep the interior dry. 

 And we want to be able to document that we are actually using the dirt around our house as a heat storage area, so we are installing conduits within which we will slide a temperature 'probe' or data logger to record the temperature of the subsurface soil around the house.
Conduit buried except screw-end at edge of retaining wall (NE)


(SE) Conduit partially buried at this point

(NW) Conduit

(SW) Conduit
The conduits all are placed at a 45 degree angle to the retaining wall, with a slight incline so that any water that might get into the conduit will drain out.  We are considering if we want to install a vertical conduit to measure the temperature below the level of the slab.

07 June 2013

Waterproofing Underway

Last week, Bill, Carol, and Kim undertook the task of starting the waterproofing process.  Tuesday, Bill and Kim powerwashed the structure.  Wednesday, Bill, Carol, and Kim applied primer to part of the main structure.  Thursday, we applied more primer, and started applying the Liquid EPDM on some of what we had previously primed.  
Primer Applied
Applying Liquid EPDM


On Friday, we were joined by Henemias and Christian. We applied Liquid EPDM over the primer and then added more primer so that the whole main structure was at least primed with the top still needed the Liquid EPDM.  
Applying the WHITE EPDM over the off-white Primer

Applying Liquid EPDM

Applying Primer on Top

On Saturday, Alfredo, Lilly, and Keith joined the ranks (a few too many hands) to apply the Liquid EPDM to all of the previously applied primer.
 
Finishing on the West side

The day's work done!

We sat back and rested and waited for the rain.

No leaks where there was Liquid EPDM.  Some leaks where there was no waterproofing material.
                            SUCCESS!

We still have to finish the West Annex, the tunnel and the retaining wall joints.
Now we await dry weather so we can finish the waterproofing.  We need 4 days in a row of no rain.  Perhaps after Father's Day.